
The Importance of TBN
TBN indicates the acid-neutralising capacity of an oil. Essential when using sulphur-rich fuel and under heavy-duty conditions, to protect against corrosion and wear.
April 9, 2020

Before inserting the key into the ignition, it's important to clean it thoroughly to prevent dirt from getting inside, which could lead to various issues. First, wipe the ignition switch clean, followed by the application of a slot spray. For example, you can use Eurol Contact Cleaner Spray for effective cleaning of your ignition switch.
Naturally, properly functioning brakes are of utmost importance. Therefore, it's crucial to check whether the wheels are still rotating freely. If you have any doubts while inspecting the brakes, consult a specialist in this area without fail. Additionally, make sure to replace the brake fluid on time and use the correct type. This prevents you from hitting the road with outdated or incorrect fluid that could damage the braking system. If you want to know which brake fluid is suitable for your motorcycle and what the recommended replacement intervals are, consult the Eurol Oil Advisor.
In addition to checking the tires for dry cracks and ensuring they are properly inflated, it's important not to force the valves unnecessarily when inflating or measuring pressure. Rubber valves, in particular, can quickly tear due to aging. Therefore, replace them if necessary before hitting the road again.
Inspect the air filter housing for dirt, insects, or other larger debris. If the air filter is blocked by debris, the engine may not start or may experience issues after starting. Therefore, before hitting the road, remove the air filter, inspect it, and clean off any dirt. Be careful not to blow smaller debris against the filter; it's preferable to use a vacuum cleaner for this task. For thorough cleaning of foam filters, Eurol offers the Eurol Air-Filter Cleaner.
Check the engine oil level according to the manual, as the method for doing so can vary by manufacturer. Often, it's recommended to check the oil level when the engine is 'cold,' but for engines with a dry-sump system, it's usually advised to do so when the engine is 'warm.' Refill or replace the oil as needed. Always opt for an engine oil specifically designed for motorcycles, which has the right properties. Eurol offers a range of motorcycle oils with different viscosities, such as Eurol Sport Touring 10W-40 or Eurol Sportbike 5W-40. If you want to know which engine oil is suitable for your motorcycle and what the recommended oil change intervals are, consult the Eurol Oil Advisor for recommendations.
Before putting your motorcycle into winter storage, it's advisable to thoroughly grease the chain, for example, with Eurol Chain Lube Spray Road & Racing or the premium lubricant Eurol Specialty Lube PL Spray with SYNGIS Technology. When you're ready to hit the road again, it's important to wipe off any excess grease from the chain with a cloth. This prevents the grease from splattering onto the rear tire as you start to ride. Additionally, check to see if any excess chain spray has leaked onto the ground over the past few months. This will help you keep your tires clean as you roll your motorcycle out onto the road.
Before taking the motorcycle off the stand, check if the inner legs of the front fork contain any rust or corrosion. Small imperfections can damage the seals. Therefore, always treat the shock absorber and the fork with a designated silicone spray, such as Eurol Silicone Multi Spray. Imperfections are easily detected by feeling with your hand; it should feel mirror-smooth. If you also want to clean and add extra shine to the other chrome and aluminum parts of your motorcycle, opt for Eurol Bike Shine Protect Spray..
If you have a carbureted engine, drain the float chambers and let the fuel tank flow for a short time. This will allow fresh fuel to enter the float chambers.
If the engine doesn't start immediately, even with a jump start, it may be because the carburetors have not yet received fuel. Therefore, it's important not to start in too short intervals consecutively. Do this approximately every 10 to 15 seconds. Once the engine is running, to prevent wear, let it warm up gradually until it reaches a water and engine oil temperature of 60°C. For a better start and smoother running engine, Eurol offers the Eurol Motorcycle Injection Clean part of the Eurol Motorcycle Additives line.
The final step is to check the lighting. Make sure all functions are still working: from low beam to high beam, turn signals, and possibly your hazard lights. Also, check the brake lights, both front and rear, to remain visible to other road users. Test your horn before hitting the road.
Eurol offers a wide range of products, including various lubricants that are ideally suited for motorcycles. If you are looking for the right lubricants for your motorcycle, consult the Eurol Oil Advisor via our website or app. You can search under the 'Motorcycles' segment, where you will find various brands and models of motorcycles.
If you need advice to address specific (technical) symptoms, use the Eurol Additives Advisor. This advisor provides product advice to prevent and solve various problems, such as high oil consumption, fixing leaks, and protection against wear. If you can't find suitable advice for your motorcycle, contact our Service Desk at phone number +31-548-750210. They are happy to assist you and can provide further help.
Source: This article is a revised version of an earlier publication from motorrijders.nl, as appeared on our website.
TBN indicates the acid-neutralising capacity of an oil. Essential when using sulphur-rich fuel and under heavy-duty conditions, to protect against corrosion and wear.
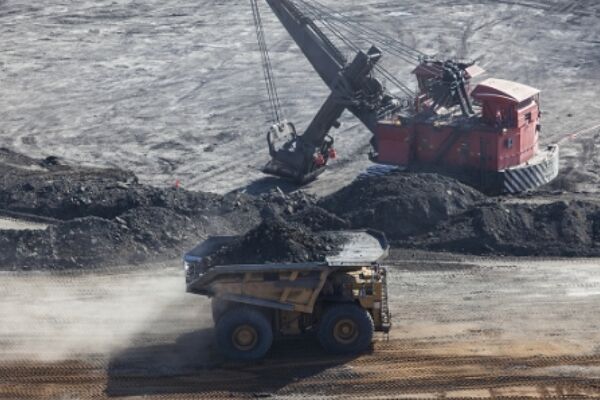
Extreme conditions in mining cause wear and downtime. Eurol offers solutions to improve the lifespan and efficiency of machinery.
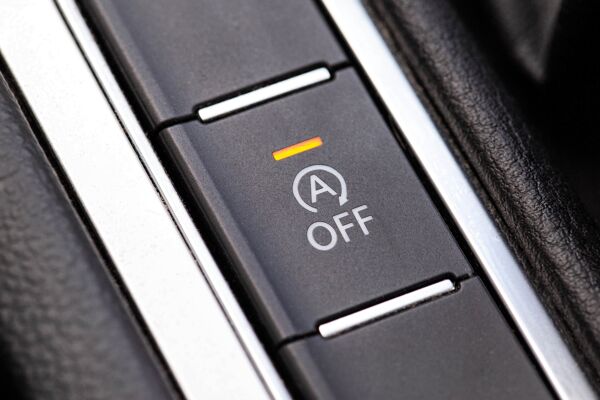
You probably are familiar with the following situation, you arrive at a traffic light and your engine stops running. Fortunately, it turns back on when you want to drive of...
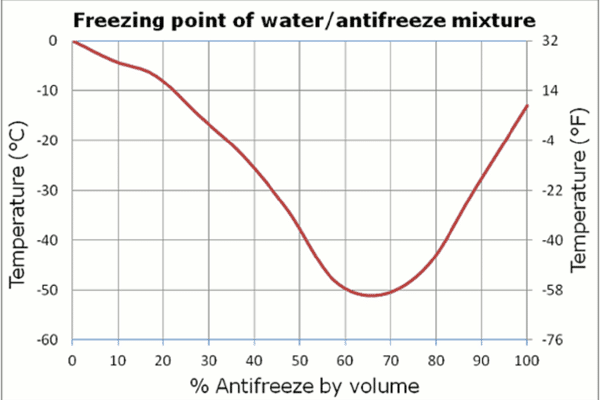
What does a coolant actually do, what are the differences between technologies, and what properties do they have? Why is it no longer possible to make a choice based on the...
TBN indicates the acid-neutralising capacity of an oil. Essential when using sulphur-rich fuel and under heavy-duty conditions, to protect against corrosion and wear.
Extreme conditions in mining cause wear and downtime. Eurol offers solutions to improve the lifespan and efficiency of machinery.
You probably are familiar with the following situation, you arrive at a traffic light and your engine stops running. Fortunately, it turns back on when you want to drive of...
What does a coolant actually do, what are the differences between technologies, and what properties do they have? Why is it no longer possible to make a choice based on the...